Tag: dead fob

Start a BMW or Mini with a Dead Key Fob

How to Start a BMW or Mini with a Dead Key Fob

Starting Your BMW or Mini

BMW Key SlotSome BMW and Mini models already require that the key fob be inserted into the dashboard next to the Start/Stop button. If the key fob battery is dead, the vehicle will recognize the fob when inserted. In “Comfort Access” models, the slot is only needed if the fob’s battery dies, or if electrical interference interrupts the fob’s signal. Insert the fob into the slot and use the Start/Stop button as normal.

For other BMW or Mini models, hold the remote control against the marked area on the steering column and press the Start/Stop button within 10 seconds while depressing the brake.

The process remains the same in the new EV line from BMW, starting with the i4 and iX. However, there are now two additional back up start methods available in these vehicles.

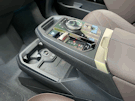
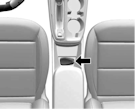
BMX consolei4 charge padThe smart phone recharge pads also act as new start points. A properly connected key card or a smart phone holding the proper BMW app touched to the pads will allow the car to start. The pad is found in front of the cup holders in the i4 (first image) and on the lower level of the iX console (second image).

Note: If you have made an attempt to start the vehicle without success, there may be residual pressure in the brake system and a new warning light may appear (left) or text Use Brake Indicatormessage to Step on the Brake. Press the brake pedal very, very hard when trying to start the vehicle again to be sure that the release switch behind the pedal is engaged. Or wait a few minutes and try again.

Video Help with Your BMW or Mini

There are lots of videos here to help out.

Recharging the Display KeyBMW Display Key

In an automotive first, BMW‘s Display Key (right) actually has a rechargeable battery. The display is automatically disabled when the charge is low, which is a major hint that the device needs to be recharged!

BMW Charge PortThe car features a wireless cell phone charging station inside the center console. There is also a bulge into which the Display Key can be slipped, with the lock button up and out. The Key is charged with a micro USB cable, a micro USB port on the Key (see the arrow on the Display Key) and the USB port at the back of the console.

Related: Getting Out!

… Return to Part I, Getting In

——————————————————————-

Remember that only proper service and repair procedures will ensure the safe and reliable operation of your car. In addition, proper safety procedures and precautions, such as the  use of safety goggles, the right tools and the equipment should be followed at all times to eliminate the possibility of personal injury or improper service which could damage the vehicle or compromise its safety.

These posts are for information sharing purposes only, and should not be used in lieu of an OEM service manual or factory authorized service procedure. We are not in the auto repair business nor do we publish automotive service manuals. Nothing we include on these pages and posts has been reviewed, approved or authorized by any vehicle manufacturer.

Technology is always changing and what is current and accurate today may be literally out-of-date and inaccurate tomorrow. And when it comes to the current state of flux in the auto industry, nothing is more true.

Permanent link to this article: https://dashboardsymbols.com/2018/11/bmw-mini-dead-key-fob-help-part-ii-getting-started/

Start a Mazda with a Dead Key Fob

How to Start a Mazda with a Dead Key Fob

Getting Your Mazda Started

Mazda uses three versions of keyless start systems, and so three are back up start options. We will show them in reverse order, newer versions first, as they are now used throughout the line. So, here’s the scoop.

Mazda Start Style 3The CX5 was the first model to use Method 3 and by 2016 all Mazda models use this method. Push the brake pedal, or the clutch pedal if you have a manual transmission. This will cause the indicator light in the Start / Stop button to flash green. While it flashes, touch the back side of the key fob to the Start / Stop button, which will cause the green indicator light to stop flashing and remain lit. Push the Start / Stop button to start the engine as normal – or with the fob itself.

Mazda Start Style 2Method 2 is found in the CX7, CX9, MX-5 and RX8 models. Remove the Start knob cover by pushing both release buttons and pulling the cover off exposing the key cylinder. Slide the auxiliary key out from the bottom of the advanced key (see above) and insert it into the cylinder. Turn the key to start the engine.

Mazda Start Style 1For Method 1, found in the Mazda3 (including MazdaSpeed3) and Mazda6 prior to 2014, slide the auxiliary key out from the bottom of the advanced key (see above). Use the auxiliary key to remove the key slot cover located on the right side of the steering column. Depress the clutch (manual) or brake pedal (automatic) until the ring around the key slot starts flashing. Insert the auxiliary key into the slot while it is flashing, but do not turn the auxiliary key in the slot. Press the push button start to start the engine.

Engine Start Operation IndicatorNote: If you have made an attempt to start the vehicle without success, there may be residual pressure in the brake system and a new warning light may appear (left) or text message to Step on the Brake. Press the brake pedal very, very hard when trying to start the vehicle again to be sure that the release switch behind the pedal is engaged. Or wait a few minutes and try again.

… Return to Part I, Getting In

——————————————————————-

Remember that only proper service and repair procedures will ensure the safe and reliable operation of your car. In addition, proper safety procedures and precautions, such as the  use of safety goggles, the right tools and the equipment should be followed at all times to eliminate the possibility of personal injury or improper service which could damage the vehicle or compromise its safety.

These posts are for information sharing purposes only, and should not be used in lieu of an OEM service manual or factory authorized service procedure. We are not in the auto repair business nor do we publish automotive service manuals. Nothing we include on these pages and posts has been reviewed, approved or authorized by any vehicle manufacturer.

Technology is always changing and what is current and accurate today may be literally out-of-date and inaccurate tomorrow. And when it comes to the current state of flux in the auto industry, nothing is more true.

Permanent link to this article: https://dashboardsymbols.com/2018/11/mazda-dead-key-fob-help-part-ii-getting-started/

Start a Jaguar or Land Rover with a Dead Key Fob

How to Start a Jaguar or Land Rover with a Dead Key Fob

Starting Your Jaguar or Land Rover

Jaguar

Jaguar Style 1 DockOn the previous page, we noted that there are three distinct Smart Key Styles. Plus, there are two ways to use the original version of the key fob.

To start your Jaguar using the the first version Smart Key fob, insert the Smart Key into the starter control unit on the driver’s side of the vehicle’s dashboard, as shown to the right. You can then press the Start / Stop button and the brake pedal as normal to start the engine.

Beginning in 2013 with the XK and X150 models, the Smart  Key fob is used in the center console. Lift the console lid and slide open the cover of the starter control unit (2) as shown again to the right. Insert the Smart Key fully into the unit. Keep the Emergency Key Blade in place to use as a handle. Press and release the Start / Stop button with the brake pedal as usual to start the engine.

Jaguar Start twoThe Smart Key can be undocked with the car in Park and the ignition off. Press the Key to release and pull it out.

With the next two Smart Key versions, while the  warning “Smart Key Not jaguar_startFound” is displayed, hold the Smart Key close to and below the auxiliary switch pack to the left of the steering wheel on the dashboard and press the Start / Stop ignition button and the brake pedal as normal. A small depression will be found in the correct location.

Land Rover and Newest Jaguars

With the Land Rover and late model Jaguars , and with the third and fourth versions of the Smart Keys, what must be done depends on whether or not the steering wheel is adjusted manually or electrically.

Land Rover Fob LocationIf it is adjusted manually, hold the Smart Key fob flat against the underside of the steering column, buttons facing down, as shown. Note the markings, three parallel lines, on the steering column that mark to the correct right spot. The Message Center in your instrument panel will display “Smart Key Recognized”. You will need to hold the key fob in place, and press the Start / Stop ignition button and the brake pedal, all at the same time, to start the vehicle. The electric I-Pace uses these markings as well.

Land Rover Fob Location 2If the steering column adjusts electrically, the process is exactly the same, except that the three parallel lines marking the correct spot are moved to the left side of the steering column. Hold the Smart Key fob against the lines with the buttons facing out, as shown. When the fob is in the right spot, the Message Center in your instrument panel will display “Smart Key Recognized”. Again, the key fob will need to be held in place, and press the Start / Stop ignition button and the brake pedal all at the same time to start the vehicle.

XE back up start positionHowever, Jaguar, beginning with the newest Smart Key in the 2020 XE and the 2021 XF and F-Pace, a new location was introduced. The Smart Key needs to be laid flat against the underside of the dashboard, again below existing switches with the buttons facing out. There is an indent in the dash to help identify the correct spot. The key fob must be help against the while stepping on the brake and pressing the start / stop ignition button.

Check our videos for additional help with Land Rovers.

Note: If you have made an attempt to start the vehicle without success, there may be residual pressure in the brake system and a new warning light may appear (left) or text Engine Start Operation Indicatormessage to Step on the Brake. Press the brake pedal very, very hard when trying to start the vehicle again to be sure that the release switch behind the pedal is engaged. Or wait a few minutes and try again.

… Return to Part I, Getting In

——————————————————————-

Remember that only proper service and repair procedures will ensure the safe and reliable operation of your car. In addition, proper safety procedures and precautions, such as the  use of safety goggles, the right tools and the equipment should be followed at all times to eliminate the possibility of personal injury or improper service which could damage the vehicle or compromise its safety.

These posts are for information sharing purposes only, and should not be used in lieu of an OEM service manual or factory authorized service procedure. We are not in the auto repair business nor do we publish automotive service manuals. Nothing we include on these pages and posts has been reviewed, approved or authorized by any vehicle manufacturer.

Technology is always changing and what is current and accurate today may be literally out-of-date and inaccurate tomorrow. And when it comes to the current state of flux in the auto industry, nothing is more true.

Permanent link to this article: https://dashboardsymbols.com/2016/05/jaguar-and-land-rover-dead-key-fob-help-part-ii/

Start a Chevrolet with a Dead Key Fob

How to Start a Chevrolet with a Dead Key Fob

Starting Your Chevrolet

Chevrolet vehicles uses all three of the key fob styles made by General Motors. There are also way too many back up start variations, but we have them all here. And you can find a whole lot of videos here.

Inside door releaseHere’s the deal: Buckle up, find your model, and if your start battery is still good, we’ll get you underway. Note that they are generally presented as sedans, then SUVs then pick ups.

Corvette

The Coupes made by GM will show up early in this list, including the Corvette (C6, C7 and C8 models). So, note immediately that the latches are electronic and if the main 12-volt battery is dead and you’ve closed the door, the lever to the right is your only escape. You will find it below the door on the floor where you would expect to find a trunk release (right). Pull it up and the door will open. There’s another on the passenger side for that door.

The rectangular style key fob is used in most GM vehicles prior to 2014. GM start 3In Corvette models built before 2014 (C6), the pocket is on the left of the inside of the glove box. Place the transmitter in the pocket with the buttons facing the glove box storage area (right). Then, with the vehicle in P (Park) or N (Neutral), press the brake pedal and the Start / Stop ignition button as normal.

In the 2014 (C7) Corvette, the transmitter pocket is moved to the right side of the steering column, as shown to the left. Place the Corvette start 2transmitter in the pocket with the buttons facing up. Again, with the vehicle in Park or Neutral, press the brake pedal and the Start / Stop ignition button as normal. Find a helpful video here. See below for the C8.

Newer, rounded “flip key” key fob and a rounded fob with a built in or pull away mechanical key, take over from here.

Camaro, later Corvette

Camaro slotPush button or keyless start is introduced to the Camaro in 2016. It also uses the cup holder as a back up slot, but to their credit, Chevrolet made this one simple. Make sure there is nothing, particularly coins, in the rear cup holder, and simply drop the fob into it. The car will recognize the key and a press of the brake pedal and Start / Stop ignition button will have you on your way. Corvettes (C8), 2020 – 2023, use this spot as well. In 2024, the Corvette spot is moved to the front cup holder.

Impala

Impala back up slotThe Impala uses a back up pocket located in the front of the center console (right). The model is using the flip key thus far through 2018. Drop transmitter into the pocket with the key ring up and the buttons facing out. With the vehicle in Park or Neutral, press the brake pedal and the Start / Stop ignition button as normal.

Look for video help here.

Volt

With the first generation Volt, open the instrument panel GM start 5storage area located above the infotainment screen and remove the rubber mat. Extend the key blade and place the blade into the slot (right).

With the vehicle in Park or Neutral, press the brake pedal and the POWER button on the center stack to start the vehicle.

Starting with model year 2016, the back-up location for the Volt is Volt fob pocketmoved to the center console, as shown. The rubber mat at the bottom of the console will need to be removed, and so anything actually in the console.

Bolt

This is also the location used by the new Bolt EV and Bolt EUV, which will be found beneath a pull-out tray.

The pocket for the fob or transmitter is beneath the pad or tray and to the front. It is also roughly the shape of the fob. Place the fob in the pocket and with the vehicle in Park or Neutral, press the brake pedal and the POWER button on the center stack to start the vehicle. We have a video of the process here.

Cruze

GM start 6The last flip key back-up start option belongs to the Cruze. You must remove the plastic trim piece from the small storage area next to the accessory power outlet near the front of the console. Extend the key blade and insert it into the transmitter slot (right). With the vehicle in Park or Neutral, press the brake pedal and the Start / Stop ignition button as normal.

Check out the video here.

Cruze back up spot 2The 2017 Cruze gets the new key and a new back up location, which is the front cup holder, as seen to the right. Sonic, Equinox and Blazer models now use this spot as well.

Simply drop the key fob into the front cup holder, buttons up, and start the car as normal, stepping on the brake and pushing the Start / Stop ignition button.

Blazer EV

Blazer EV back up spotThe 2024 Blazer Electric Vehicle (EV) is a different animal. Its back up spot is at the bottom of the center console storage area. Drop the key fob on the spot shown (right) with the buttons up.

And it starts differently as well. Once the key fob is in its spot, simply step on the brake. The instrument panel will tell you if you have been successful.

Trax

Trax back upThe Trax, which first saw push button start in 2017, also uses the front cup holder as its back up slot. However, there are three cup holders in the center console area, with the front one being separated from the two behind it. Be sure to use the one in the very front. See the image to right.

Drop the key fob into the front cup holder, buttons up, and start the car as normal, using the Start / Stop button while stepping on the brake pedal.

Check out a videos for all these models here.

Trailblazer

Trailblazer pocketThe new Trailblazer model has the back up pocket in front of the center console storage area and behind the the two cup holders on the console (image at right). Drop the key fob into the pocket or depression, The manual states that the buttons should be facing the front, but we don’t believe this is possible given the shape of the pocket. We also believe that it will not likely matter. With the vehicle in Park or Neutral, press the brake pedal and the Start / Stop ignition button as normal.

Tahoe, Suburban

Until 2021, the large SUV’s from GM, including the Tahoe and Suburban, feature a transmitter Tahoe Escalade Suburban back-uppocket also located in the face of the front of the inside of the center console. However, the pocket points down, as shown to the right. Slide the transmitter into the pocket with the key ring facing out, buttons forward (in the Suburban we had on hand, the engine started with the buttons facing either way). It is a loose fit, so don’t be concerned. With the vehicle in Park or Neutral, press the brake pedal and the Start / Stop ignition button as normal. Check out the video here.

Traverse

Traverse back up slotIn the Chevrolet Traverse, through 2023, the transmitter pocket is at the bottom of the center console storage area, as seen in the image to the right. The outline of the transmitter will be visible to the front of the console. The 2024 Traverse uses the left or driver’s side cup holder, exactly like the Silverado EV below. Once the fob is in place, press the brake pedal and the Start / Stop ignition button as normal to start the vehicle.

Spark

Spark models also have what is called a transmitter pocket in the center console, but no image defining a location is Spark consoleshown in the manual. There are three storage spots in the console (see the red arrows), and one of them will be the “pocket” but none of them are actually marked. Drop the transmitter or key fob in the front storage spot first and attempt to start the car normally, with your foot on the brake and pressing the Start / Stop button.

If this does not work, move to the storage spot furthest back and try starting again. If the car again fails to start, try the longer storage spot alongside the emergency brake. If the starting problem is associated with a dead battery in the key fob, one of the three locations will work!

Silverado, Malibu

Malibu Impala back-upIn the Silverado pick up (note that the electric version is discussed below) and the Malibu sedan, the pocket for the transmitter is located in the face of the rear of the inside of the center console. Silverado gets push button start for the first time in 2019. Slide the transmitter into the pocket with the key ring facing up, and the buttons out (or however it will fit!).

The Silverado’s pocket is larger, as is the center console, which is actually the center seat in the bench seat. With the vehicle in Park or Neutral, press the brake pedal and Silverado bucket pocketthe Start / Stop ignition button as normal. The pocket in 2021 Tahoe and Suburban models with a bench seat is also moved to this location, at the back of the console.

Tahoe, Suburban, later Silverado

If the Silverado, Tahoe or Suburban models have bucket seats, the pocket is found in or near the the two cup holders. In the Silverado, slip the key fob or transmitter into the insert between the cup holders (first image to the right). In the Tahoe or Suburban, as well as the Silverado EV, drop the Tahoe bucket pockettransmitter into the left side cup holder (second image below right).

Once again, with the vehicle in Park or Neutral, press the brake pedal and the Start / Stop ignition button as normal. The Silverado EV starts when the brake pedal is depressed.

And we have a video of the process here.

Note: If you have made an attempt to start the vehicle without success, there may be residual pressure in the brake system and a new warning light may appear (left) or text Engine Start Operation Indicatormessage to Step on the Brake. Press the brake pedal very, very hard when trying to start the vehicle again to be sure that the release switch behind the pedal is engaged. Or wait a few minutes and try again.

… Return to Part I, Getting In

——————————————————————-

Remember that only proper service and repair procedures will ensure the safe and reliable operation of your car. In addition, proper safety procedures and precautions, such as the  use of safety goggles, the right tools and the equipment should be followed at all times to eliminate the possibility of personal injury or improper service which could damage the vehicle or compromise its safety.

These posts are for information sharing purposes only, and should not be used in lieu of an OEM service manual or factory authorized service procedure. We are not in the auto repair business nor do we publish automotive service manuals. Nothing we include on these pages and posts has been reviewed, approved or authorized by any vehicle manufacturer.

Technology is always changing and what is current and accurate today may be literally out-of-date and inaccurate tomorrow. And when it comes to the current state of flux in the auto industry, nothing is more true.

Permanent link to this article: https://dashboardsymbols.com/2015/01/general-motors-dead-key-fob-help-part-ii/

Start a Ford with a Dead Key Fob

How to Start a Ford with a Dead Key Fob

Starting Your Ford

Ford Motor Co. vehicles employ far too many backup methods, with new variations added seemingly each year. For full- and mid-size vehicles, insert the Intelligent Access key in the backup slot, located in the center console or in or under the cup holders, depending on the model. The Escape, Focus and Fiesta models use other methods, which are addressed below.

We have over a dozen options, all shown below. Search the page for your model.

The backup slot for full- and mid-size vehicles is the same as that used for key programming. In all cases, the slots do not look at all obvious, except that they are the proper size for the Intelligent Access key.

After inserting the key into the backup slot, use the Start / Stop ignition button and brake pedal to start your vehicle as usual. The vehicle should respond normally as long as the Intelligent Access key is in the slot.

Once the vehicle is started, the key can be removed from the backup slot, if you wish. But first, you will need to locate the slot.

Ford GT

GT release strapFirst a word of caution concerning the Ford GT. Its latches are entirely electronic, the result being that, in the event of a power failure while inside the car, a back up plan is necessary. There is a strap on each pillar alongside each seat, as seen n the image to the right. Pull it to release the door.

Locating the Back-up Slot

Taurus, Fusion, Explorer Expedition, Flex

The backup slot is located in the center console in the Taurus, Fusion, Explorer, Expedition (through 2017) and Flex. The exact location will vary somewhat. Most consoles are filled with stuff, so you may need to dig a bit.

Ford Lincoln Console backupIn the Taurus, Expedition (before 2018) and Flex the Intelligent Access key slot is to the rear or the side of the console and points up. The key is slipped in vertically or horizontally depending on the slot’s shape, with the buttons facing out, as in the image shown. After inserting the key, use the Start / Stop ignition button and brake pedal to start your vehicle as usual. If it fails to start, turn the fob so that the buttons face back and try again. Once the vehicle is started, the key can be removed from the backup slot, if you wish.

You will find a video of the process here that will help.

Expedition slotIn the updated (2018) Expedition, and (2025) Explorer (with bucket seats — see well below for column shift models) models the back up slot is in the front cup holder (Expedition) and rear cup holder (Explorer). There is a two-piece mat at the bottom, and the front piece needs to be pulled away. It is a loose fit and slips out easily. Drop the key fob into the slot with the buttons facing the back of the vehicle and start it as normal.

It may take two pushes of the button to start. Again, once the car is started, the Intelligent Access key or fob can be removed and the mat, and any cups, replaced.

Ford Lincoln Front Console backupIn Explorer and Fusion models, the slot is found near the Auxiliary, USB and power ports in the center console, like the one shown. The Intelligent Access key is slipped in with the buttons facing out (in the Explorer we had, the vehicle started with the buttons facing either direction) and the key ring up.

After inserting the key, use the Start / Stop ignition button and brake pedal to start your vehicle as usual. Once the vehicle is started, the key can be removed from the backup slot, if you wish.

We have a video for this process as well here.

Transit back upTransit

New in 2019, the Transit Connect uses push button start for the first time. The back up slot is also in the cup holder. The rubber mat at the bottom of the cup holders needs to be removed and Ford recommends removing the mechanical key as well. Lay the key fob in the front cup holder with the buttons facing up and the unlock button towards the front of the vehicle. Step on the brake and start the vehicle as normal using the Start / Stop button.

Ranger

Ranger back upThe new Ranger compact pick up also uses a cup holder, the rear one. Place the key fob in the cup holder making sure that it is centered and is parallel to the brake handle, as can be seen in the image at right. The truck can then be started by stepping on the brake and using the Start / Stop button as normal.

Edge

The Edge back up slot is inside the center console, but actually beneath the the front of the console (right). It is difficult to see, but it can be felt as raised tray just the right size for the remote control. Slip the remote onto the tray with the buttons up and press the Start / Stop button while stepping on the brake as normal.

2017 Escape back upEscape

The 2017 Escape has a new back up location (see below for earlier Escape models), which is changed again in 2018.

In a 2017 model, place the key fob on the small tray at the front of the center console, as shown in the image to the right. Remove anything that may be placed there. Once it is in position, use the Start / Stop ignition button and brake pedal to start your vehicle as usual.

2018 Escape back upIn the 2018 Escape, the back up slot is found in the front cup holder. The bottom is marked with radiating lines meant to indicate radio waves. Remove anything that may be in the cup holder and set the fob inside, as shown in the image at right. Once it is placed, use the Start /Stop ignition button to start the vehicle while stepping on the brake as normal.

The key fob can be removed from the back up location once the vehicle is started, if you wish.

Escape back up spotBronco, Maverick, Transit (2024 and later)

And in 2019, the back up slot for the Escape is back at the front of the center console, beneath a mat that must be removed (right). The new Bronco Sport, introduced in 2021, as well as Transit models beginning in 2024 share this location. A fob-shaped depression will be seen once the mat is removed. Place the fob on the spot with the buttons up. Once it is placed, use the Start Bronco back up start/Stop ignition button to start the vehicle while stepping on the brake as normal.

The standard Bronco and the Maverick, introduced in 2022, uses a spot found at the bottom of the center console. There is no mat to remove, although any items stored there will need to be moved out of the way. A fob-shaped depression will be seen. Place the fob in the spot with the buttons facing up.

EcoSport

EcoSport slotThe EcoSport, introduced in 2018, also uses a location in the front of the center console. Drop the fob into the slot with the key ring up and the buttons facing the back. After inserting the key fob, use the Start / Stop ignition button and brake pedal to start your vehicle as usual. And again, the key fob can be removed from the backup slot once the vehicle is started, if you wish.

Mustang MKZ backupMustang, Fusion, Expedition

New in the 2015 Mustang, the 2017 Fusion, and the 2018 Expedition (as noted previously), the backup slot is hidden under one of the cup holders.

A rubber mat at the bottom of the cup holders may need to be removed (A) to expose the slot (B), as shown. Of course any cups will have to come out too! Look for a tab towards the front or the side of the mat to grab and pull (gently!)*.

*Important: If you do not find a pull tab, do not try removing the mat. Simply place the key fob in the rear cup holder and start the car as normal.

After inserting the key fob, buttons facing the back of the car, in the exposed slot, use the Start / Stop ignition button and brake pedal to start your vehicle as usual. Once the car is started, the Intelligent Access key can be removed and the mat, and any cups, replaced.

Mustang back up startIn 2024, Ford moved the Mustang back up start slot to the bottom of the center console. Remove the mat covering the bottom — as well as anything stored there — and place the fob in the fob-shaped depression with the buttons facing up.

Find another video for these models here.

Mustang E back up slotMustang Mach E

The new all electric Mustang Mach E has a back up slot at the front of the center console storage area, next to the 12-volt power outlet (right). Place the remote control in the slot as shown (2) with the buttons facing up (or out).Once the remote control is in position, press the Start / Stop button while stepping on the brake to activate the high voltage battery.

Note also that the Mach E  can be started with a smart phone app and/or a passcode inputted on the touch screen if the key fob or phone is not recognized. The car will request the code.

Ford Pick-up OneF-150, Explorer, F-150 Lightning

Push Button Start is new to the Ford Pick-up line in 2015, first with the F-150, and it has two back-up start options. If the shifter is on the steering column, look inside the center console to the rear for the slot. Note that there are two console storage areas. The one needed and shown is beneath the center bench seat. Similar 2025 Explorer models use this spot as well.

Insert the Intelligent Access key with the buttons facing to the back and the key ring up. Then use the Start / Stop ignition button and brake pedal to start your vehicle as usual. Once the vehicle is started, the key can be removed from the backup slot, if you wish.

Ford Pick-up TwoIf the shifter is on the center console through 2016, the slot will be under the rubber mat in front of the shifter. Remove the mat and insert the Intelligent Access key with the buttons facing up.

After inserting the key, use the Start / Stop ignition button and brake pedal to start your vehicle as usual. Once the vehicle is started, the key can be removed from the backup slot, if you wish.

Ford truck back up slotIn 2017, trucks with the shifter on the center console have the back up slot moved to one of the cup holders. Through 2020, the front cup holder is used, but it is moved to the rear cup holder starting in 2021. All Lightning models use the rear cup holder. Remove the mat at the bottom (see image) by pulling the tab and stand the key fob up in the slot, buttons forward. Then press the Start / Stop button while stepping on the brake as normal.

There is also a video of the process here.

F-250 slotF-250

In the F-250 or larger truck, the slot is located beneath the tray to the left of the cup holders in the center console. Remove the tray and the cover from the center console. The slot, which is in the shape of the key fob, or Intelligent Access key, will be exposed.

Place the fob in the slot with the buttons facing up and use the Start / Stop button to start the vehicle as normal. Again, the key fob can be removed after starting.

Fiesta, Focus, Escape, C-Max

Transmitter IconColumn Slot CoverThe compact Focus has five variations alone, with the Escape and C-Max sharing two of them and the Fiesta sharing one. The fifth Focus variation belongs to 2016 models only. All are located on the right side of the steering column near the windshield wiper lever. And see below for Fiesta and Focus models built after 2020 and not sold in North America.

First, look for either a radiating symbol printed on the column like the image to the left or for a round cover, shown to the right. These locations are where communications from the Intelligent Access key are picked up by the vehicle.

Ford Column Slot backupIf you see the transmitter symbol, which may have a key or tower in between the radiating lines, and you have a three button Intelligent Access key, slip the key into a small slot beneath the symbol, as shown.

After inserting the key, use the Start / Stop ignition button and brake pedal to start your vehicle as usual. Once the vehicle is started, the key can be removed from the backup slot, if you wish.

Ford Side Column backupIf you have a five button Intelligent Access key, place the key against the transmitter symbol, as shown in the image, and start the vehicle. The vehicle will recognize the key, even if the key’s battery is dead. Use the Start / Stop ignition button and brake pedal to start your vehicle as usual.

Ford Slot Under CoverIf you see a cover, like the one shown above, there are two options. If a small slot or notch is visible, as seen in the image, pry off the cover using the mechanical key and insert the Intelligent Access key, as shown.

After inserting the key, use the Start / Stop ignition button and brake pedal to start your vehicle as usual. Once the vehicle is started, the key can be removed from the backup slot, if you wish.

Fiesta Cover Touch backupIf the covering does not have a slot or notch to pry off the cover, which will include Fiesta models, simply hold the Intelligent Access key against the cover, similar to the five-button process shown above and as shown here, and start your vehicle using the Start / Stop ignition button and brake pedal as usual. The vehicle will recognize the key, even if the key’s battery is dead.

Focus consoleIn 2016 and going forward, Ford made a change in the Focus. The back-up slot will be found at the bottom of the center console. It will appear as a depression in the floor of the console in roughly the shape of the key fob.

With the console open, you’ll need to remove the storage tray, as shown, and everything stored beneath in it!

Place the key fob flat on the symbol at the bottom of the Ford console 2console storage compartment with the buttons facing up.

With the fob or intelligent key in this back up location, the car can be started using the Start / Stop button and stepping on the brake as normal.

Fiesta and Focus back upFiesta and Focus models built after 2020 feature a small storage area in front of the shift lever on the center console. The area’s rubber mat must be removed, much like the pick up trucks with center console shifters seen earlier.  There is even the mark of a key with lines radiating from it to point out the location (top arrow). Place the fob as shown (lower arrow) with the buttons up.  Step on the brake and start the car using the Start / Stop ignition button as normal.

GT

GT back up slotFinally, if you happen to have the GT model, the back up location is a storage tray at the front of the center console beneath its rubber mat, like the Fiesta and Focus above. Lift the mat and place the key fob with the buttons up, as shown in the image. Step on the brake and start the car using the Start / Stop ignition button as normal.

The key fob can be removed and the mat replaced after the starting the car, if you wish.

Note: If you have made an attempt to start any of these vehicles without success, there may be residual pressure in the brake system and a new warning light may appear (left) or text Engine Start Operation Indicatormessage to Step on the Brake. Press the brake pedal very, very hard when trying to start the vehicle again to be sure that the release switch behind the pedal is engaged. Or wait a few minutes and try again.

… Return to Part I, Getting In

——————————————————————-

Remember that only proper service and repair procedures will ensure the safe and reliable operation of your car. In addition, proper safety procedures and precautions, such as the  use of safety goggles, the right tools and the equipment should be followed at all times to eliminate the possibility of personal injury or improper service which could damage the vehicle or compromise its safety.

These posts are for information sharing purposes only, and should not be used in lieu of an OEM service manual or factory authorized service procedure. We are not in the auto repair business nor do we publish automotive service manuals. Nothing we include on these pages and posts has been reviewed, approved or authorized by any vehicle manufacturer.

Technology is always changing and what is current and accurate today may be literally out-of-date and inaccurate tomorrow. And when it comes to the current state of flux in the auto industry, nothing is more true.

Permanent link to this article: https://dashboardsymbols.com/2015/01/ford-and-lincoln-dead-key-fob-help-part-ii/

Start a Hyundai, Genesis or Kia with a Dead Key Fob

How to Start a Hyundai, Genesis or Kia with a Dead Key Fob

Starting Your Hyundai, Genesis or Kia

Hyundai, Genesis and Kia use no less than seven different ways to start the vehicle if the Smart Key is weak or the Smart Key does not work correctly. However, the companies are migrating all their models to Method 6, smartly standardizing the process. That is until Genesis seemed to take a step back in 2021.

And if your start battery is still good, we’re going to get you going! Just follow along.

Kia/Hyun Start Style 6The latest models from all three manufacturers — with two exceptions — have a much simplified process. Staring with vehicle updates in the 2013 model year, simply press the Start / Stop ignition button with the Smart Key while depressing the brake to start the vehicle. We originally named this the back up start Method 6. If this does not work in your model, continue on below for a method that will.

EV button2021 Genesis G80 consoleThe exceptions noted are first, an EV button (far left) in Kia EVs. It is pushed just like the Start / Stop button. The second exception is the 2021 Genesis G80, which is now a Seventh Method. This method has moved to the 2022 GV60 EV as well, and may yet be placed in other models. If the vehicle does not recognize the key fob or Smart Key, slip the Smart Key into the space behind the shifter dial and cup holders and in front of the leather of the console. See the second image to the left. Then, step on the brake and push the Start / Stop ignition button to start the vehicle as normal.

Genesis charging padWe must also add an Eighth Method, which is digital. In the new GV60, G70, GV70, G80 and G90, a registered smart phone or a pre-registered card key can be placed on the vehicle’s wireless charging pad. It is found in front of the center console storage area (left). Once in place, the vehicle can be started as normal.

Kia/Hyun Start Style 1The Kia Forte, Sportage, and Sorento and Hyundai Sonata (prior to 2014) use Method 1. Insert the Smart Key in the Smart Key holder, which is a slot inside the center console, then press the Start / Stop ignition button while depressing the brake. To remove the Key, press it, then pull. Check out the video below.

Kia/Hyun Start Style 2The Kia Magentis also uses a slot in the center console in Method 2. Insert the Key and then press the Start / Stop ignition button while depressing the brake. To remove, press the Smart Key inward past the detent and then pull it outward.

Kia/Hyun Start Style 3The Hyundai Genesis, built before 2014, uses Method 3, which is a slot located behind a door above the shifter. Insert the Key and then press the Start / Stop ignition button while depressing the brake. To remove the Key, press it and then pull it out.

Kia/Hyun Start Style 4The Kia Optima (prior to 2014) and Soul and Hyundai Equus use Method 4, which is a slot in the glove box. The slot is a little higher in the Equus. Insert the Key and then press the Start / Stop ignition button while depressing the brake. To remove the Key, press it and then pull it out.

Kia/Hyun Start Style 5The Kia Borrego uses the Method 5 slot, which is in the dash just below the Start /Stop ignition button. It should be readily visible. Insert the Smart Key and then press the Start / Stop button while depressing the brake. To remove the Key, release it by pressing and then pull it out.


Note: If you have made an attempt to start the vehicle without success, there may be residual pressure in the brake system and a new warning light may appear (left) or text Engine Start Operation Indicatormessage to Step on the Brake. Press the brake pedal very, very hard when trying to start the vehicle again to be sure that the release switch behind the pedal is engaged. Or wait a few minutes and try again.

Video Help

Click here for videos to walk you through the processes.

… Return to Part I, Getting In

——————————————————————-

Remember that only proper service and repair procedures will ensure the safe and reliable operation of your car. In addition, proper safety procedures and precautions, such as the  use of safety goggles, the right tools and the equipment should be followed at all times to eliminate the possibility of personal injury or improper service which could damage the vehicle or compromise its safety.

These posts are for information sharing purposes only, and should not be used in lieu of an OEM service manual or factory authorized service procedure. We are not in the auto repair business nor do we publish automotive service manuals. Nothing we include on these pages and posts has been reviewed, approved or authorized by any vehicle manufacturer.

Technology is always changing and what is current and accurate today may be literally out-of-date and inaccurate tomorrow. And when it comes to the current state of flux in the auto industry, nothing is more true.

Permanent link to this article: https://dashboardsymbols.com/2015/01/hyundai-and-kia-dead-key-fob-help-part-ii/

Open a Mazda with a Dead Key Fob

Mazda logoHow to Open a Mazda with a Dead Key Fob

Mazda Mechanical KeyRetrieving the mechanical key

For early Mazda models, slide the release lever on the back of the advanced key (remote control or ‘clicker’) to release the auxiliary (mechanical) key. Pull out the auxiliary key from the advanced key. Use the key to unlock the driver’s door.

Mazda key fobIn 2020, Mazda introduced a new key fob style. It is distinguished by the lock, unlock etc. buttons being found on one side of the fob. The mechanical or auxiliary key is found inside.

To access it, slide the lever found on the top of the fob towards the side, as the arrow indicates. The back cover can then be slid Mazda key fob and mechanical keyaway in the opposite direction and removed. The mechanical key can be seen inside and is simply lifted away, as shown.

If a key hole is visible, simply insert the mechanical key and turn and you’re in.

However, also in 2020, Mazda introduced a new door handle in the the Mazda3 and CX-30 models. This change has moved to the CX-50 and CX-90 by 2025. In these Mazda door handlemodels, the key hole can be seen only when the door handle is pulled to the open position. It may be awkward to reach and drivers with large hands may have difficulty, but the mechanical key must be inserted into the key hole while the door handle is pulled open. See the image to the right.

Once inserted, turn the key to the right. Return the key to the original position and remove it. Release the handle and pull it open again and you’ll be inside the car.

For pre-2020 models, there is video help here.

Continue to Part II, Getting Started …

——————————————————————-

Remember that only proper service and repair procedures will ensure the safe and reliable operation of your car. In addition, proper safety procedures and precautions, such as the  use of safety goggles, the right tools and the equipment should be followed at all times to eliminate the possibility of personal injury or improper service which could damage the vehicle or compromise its safety.

These posts are for information sharing purposes only, and should not be used in lieu of an OEM service manual or factory authorized service procedure. We are not in the auto repair business nor do we publish automotive service manuals. Nothing we include on these pages and posts has been reviewed, approved or authorized by any vehicle manufacturer.

Technology is always changing and what is current and accurate today may be literally out-of-date and inaccurate tomorrow. And when it comes to the current state of flux in the auto industry, nothing is more true.

Permanent link to this article: https://dashboardsymbols.com/2012/04/mazda-dead-fob-help/