Tag: Start/Stop button

Start a Volvo or Polestar with a Dead Key Fob

How to Start a Volvo or Polestar with a Dead Key Fob

Starting Your Volvo or Polestar

Volvo Back Up Style 2Beginning with the 2020 XC-90 redesign and the newer key fob style, plus Polestar EV models, a sensor location is provided for the key fob. It is found in the second cup holder in the center or tunnel console. An illustration of a key with lines radiating from it can be seen at the bottom of the cup holder.

Polestar 2 back upNote that you will find the mark inside the small center console of the Polestar 2 (right), which is also the location of the second cup holder! Place the key fob in the cup holder. The vehicle will recognize the fob even if the fob’s internal battery is dead. The alarm will be turned off and the car can be started as normal, by turning the Start / Stop switch to the Start position while depressing the brake. Note that the Polestar 2 is started, or powered up, by stepping on the brake.

XC-40 backup locationIn the Volvo XC-40, the company’s first all electric model, and subsequently the C40 and EX40 EVs, the mark will be found inside the center console on the bottom and to the front (right). It too features the mark of a key with lines radiating from it. Place the key fob on the mark. The vehicle will recognize the fob even if the fob’s internal battery is dead. The alarm will be turned off and the car can be started as normal.

Beginning in 2021, a smart phone app became available for both Volvo and Polestar models and can be used to open and start these vehicles. A key card is added beginning in 2024, and the key fob cannot be used to start the car with a depleted battery.

Polestar 3 card readerSo, in both the Polestar 3 and 4, the key card is placed on the spot used to charge your smart phone (right), which is at the front of the center console. The key fob for the Polestar 3 can be recharged on this spot, the card reader, as well.

In any case, using the key card to start your car requires that noting else is on the card reader. It cannot simultaneously charge a phone and a key fob. The reader cannot read the card either if something is being charged.

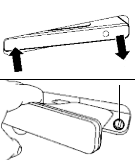
Volvo Key SlotIn older, second generation keyless start Volvo models, an ignition slot comes into play. The slot will be found either alongside or below the Start/Stop ignition button. Insert the key fob into the ignition slot. This will turn off the alarm and allow the vehicle to be started as normal by pressing the Start / Stop button while depressing the brake.

Volvo Slot #2The vehicle will recognize the key fob even if the fob’s internal battery is dead.

The remote key can be removed from the ignition slot by pressing the it in lightly. The remote key will then be ejected slightly and can be removed from the slot.

Early Volvo backup startIn first generation keyless start models, the ignition switch is turned in normal conditions, similar to key start vehicles. There is a dummy key that needs to be removed. Press the the button found on the side of the dummy key, which frees it to be pulled away. The key fob can then be inserted in its place and the vehicle can be started (right).

Click here for video help specific to Volvo and Polestar models.

Use Brake IndicatorNote: If you have made an attempt to start the vehicle without success, there may be residual pressure in the brake system and a new warning light may appear (left) or text message to Step on the Brake. Press the brake pedal very, very hard when trying to start the vehicle again to be sure that the release switch behind the pedal is engaged. Or wait a few minutes and try again.

… Return to Part I: Getting In

——————————————————————-

Remember that only proper service and repair procedures will ensure the safe and reliable operation of your car. In addition, proper safety procedures and precautions, such as the  use of safety goggles, the right tools and the equipment should be followed at all times to eliminate the possibility of personal injury or improper service which could damage the vehicle or compromise its safety.

These posts are for information sharing purposes only, and should not be used in lieu of an OEM service manual or factory authorized service procedure. We are not in the auto repair business nor do we publish automotive service manuals. Nothing we include on these pages and posts has been reviewed, approved or authorized by any vehicle manufacturer.

Technology is always changing and what is current and accurate today may be literally out-of-date and inaccurate tomorrow. And when it comes to the current state of flux in the auto industry, nothing is more true.

Permanent link to this article: https://dashboardsymbols.com/2018/11/volvo-dead-key-fob-help-part-i-getting-started/

Start a Chrysler, Dodge or Ram with a Dead Key Fob

How to Start a Chrysler, Dodge or Ram with a Dead Key Fob

Starting Your Chrysler, Dodge or Ram Vehicle

In Chrysler and Dodge vehicles built prior to 2009 and using the rectangular-tipped key, the Engine Start / Stop button must be removed from the ignition switch for key fob use. With the ignition in the Lock position, insert the metal part of the emergency key (or a finger nail!) under the chrome button (above right) and gently pry the button loose. It comes away very easily. Note that the button itself appears to float Chrysler key slotjust above the dash.

Insert the rectangular tip of the key fob into the exposed ignition switch slot and turn the key to start and operate.

For models built after 2010, including Ram trucks, using the rounded key fob, place the “nose” side (side opposite of the mechanical key – its very sensitive to this) of the Key Fob against the Start / Chrysler Emergency Start TwoStop ignition button (right) and push to operate the ignition switch.

Do NOT try to remove this button! We have actually seen an owners manual citing the older key and button. Do NOT remove the flush button. Simply press the button with the nose of the key fob!

Hornet back up start startIn 2023, Dodge introduced the Hornet model, and it uses a very different back-up start method. The key fob needs to be placed in the front cup holder (rightt). The fob may need to be removed from a key chain to make this work.

Once in the cup holder, simply press the Start / Stop ignition button while stepping on the brake as usual.

We have several videos here that will help.

Use Brake IndicatorNote: If you have made an attempt to start the vehicle without success, there may be residual pressure in the brake system and a new warning light may appear (left) or text message to Step on the Brake. Press the brake pedal very, very hard when trying to start the vehicle again to be sure that the release switch behind the pedal is engaged. Or wait a few minutes and try again.

——————————————————————-

Remember that only proper service and repair procedures will ensure the safe and reliable operation of your car. In addition, proper safety procedures and precautions, such as the  use of safety goggles, the right tools and the equipment should be followed at all times to eliminate the possibility of personal injury or improper service which could damage the vehicle or compromise its safety.

These posts are for information sharing purposes only, and should not be used in lieu of an OEM service manual or factory authorized service procedure. We are not in the auto repair business nor do we publish automotive service manuals. Nothing we include on these pages and posts has been reviewed, approved or authorized by any vehicle manufacturer.

Technology is always changing and what is current and accurate today may be literally out-of-date and inaccurate tomorrow. And when it comes to the current state of flux in the auto industry, nothing is more true.

Permanent link to this article: https://dashboardsymbols.com/2018/11/chrysler-and-dodge-dead-key-fob-help-part-i-getting-started/

Start a Nissan or Infiniti with a Dead Key Fob

How to Start a Nissan or Infiniti with a Dead Key Fob

Starting Your Nissan or Infiniti

Nissan Key Port 1Two methods exist in Nissan and Infinity vehicles. Some models use method 1. In this case, insert the Intelligent Key in the port provided. It will be found to the left of the steering column. It might be horizontal (first image) or vertical (second image).

If an attempt is made to start the vehicle with a discharged Intelligent Key, a guide light will illuminate at the port. Insert the key fob with the buttons up in the horizontal Nissan Key Port 2port or with the buttons facing the door in the vertical port. Make sure the key ring side is out.

Once the key fob is inserted, the vehicle can be started as normal by pressing the Start / Stop ignition button while depressing the brake. Note that the port does not recharge the fob’s battery.

Nissan Start StyleIf a port does not exist, method 2 comes into play. Simply touch the ignition switch with the Intelligent Key (a chime will sound). Push the ignition Start / Stop button while depressing the brake pedal within 10 seconds after the chime sounds to start the engine.

Mercedes Start ButtonAnd finally, in the Infiniti QX30, the Start / Stop button appears to ‘float’ above the dashboard. Pull it away exposing the ignition switch. If necessary the tip of the mechanical key can be used as a pry bar.

Please, please, do NOT try this if you do NOT have a tapered key as shown above! Insert the tapered end of the key fob into the switch and turn to start the car old school style.

Note: If you have made an attempt to start the vehicle without success, there may be residual pressure in Use Brake Indicatorthe brake system and a new warning light may appear (left) or text message to Step on the Brake. Press the brake pedal very, very hard when trying to start the vehicle again to be sure that the release switch behind the pedal is engaged. Or wait a few minutes and try again.

Click here for video help with Nissan and Infiniti models and key fobs.

Models examined include 370Z, Altima, Armada, Cube, Frontier, GT-R, Juke, Kicks, Maxima, Murano, NV, Pathfinder, Quest, Rogue, Sentra, Titan, Versa, Xterra, Z, EX, FX, G, JX-35, M, Q40, Q50, Q60, Q70, QX30, QX50, QX55, QX56, QX60, QX70, and QX80.

… Return to Part I, Getting In

——————————————————————-

Remember that only proper service and repair procedures will ensure the safe and reliable operation of your car. In addition, proper safety procedures and precautions, such as the  use of safety goggles, the right tools and the equipment should be followed at all times to eliminate the possibility of personal injury or improper service which could damage the vehicle or compromise its safety.

These posts are for information sharing purposes only, and should not be used in lieu of an OEM service manual or factory authorized service procedure. We are not in the auto repair business nor do we publish automotive service manuals. Nothing we include on these pages and posts has been reviewed, approved or authorized by any vehicle manufacturer.

Technology is always changing and what is current and accurate today may be literally out-of-date and inaccurate tomorrow. And when it comes to the current state of flux in the auto industry, nothing is more true.

Permanent link to this article: https://dashboardsymbols.com/2018/11/nissan-infiniti-dead-key-fob-help-part-ii-getting-started/

Recall Trend Highlights Electronic and Safety Systems

Recall Trend

Pre Collision System OffA disturbing trend appeared in the recalls (2015) we tracked since our last newsletter. Six recalls were issued involving automated electronic systems, including safety systems directly and indirectly. And they simply got more troublesome through the course of the month.

  • First, GM recalled 51,000 Spark, Sonic models for radio, warning glitch. The warning glitch included chimes that would warn of the keys left in the ignition or of a seat belt that is not in use.
  • Next, Nissan recalled 14,595 vehicles for a sticky start/stop button. In hot temperatures, the engine start/stop button in affected vehicles may stick inside the button housing.
  • Ford then recalled 433,000 vehicles for a faulty body control module that can prevent affected vehicles from turning off, even if the key is removed from the ignition or stop/start button has been pressed.
  • Ford followed that up with a 393,623 vehicle recall for electric power steering assist systems that may shut down due to a sensor fault.
  • EyeSight Off Indicator SymbolSubaru then recalled 72,000 cars with its EyeSight active safety system for a brake light switch that can interfere with the software that triggers the automatic braking.
  • And finally, as we were putting this item together, Fiat Chrysler Automobiles issued a recall to address remote hacking of some of its vehicles – after hackers took control of Jeep remotely!

Right now, manufacturers expect drivers to put their safety in their hands in an ever expanding universe of new electronic systems. Over time, car makers fully expect that drivers will eventually agree to cede all control of their cars to the car itself, and thus to its manufacturer.

Power steering that could shut off? Braking that is to rely on the car “seeing” what is ahead? Cars that can’t be shut off or a start/stop button that is stuck? Cars that fall under the control of hackers??

A Call to Action

The industry had better get this right, and while the recalls in these cases are supposed to set things right, things need to be a whole lot righter than they are now. The National Highway Traffic Safety Administration (NHTSA) is actively involved in research into in-vehicle crash avoidance systems, vehicle-to-vehicle (V2V) communications that support crash avoidance applications, and self-driving vehicles themselves. We truly hope they have their eye on the ball. These kinds of problems need to be addressed before systems hit the streets – before recalls are needed!

And here’s a question we have not seen asked: When your car gets to truly driving itself, will this mean that the manufacturer will then hold accident liability? Hell, do they now for current automated safety systems? Will we get to cancel our auto policies down the road?

We’ll find out soon enough.

——————————————————————-

Remember that only proper service and repair procedures will ensure the safe and reliable operation of your car. In addition, proper safety procedures and precautions, such as the  use of safety goggles, the right tools and the equipment should be followed at all times to eliminate the possibility of personal injury or improper service which could damage the vehicle or compromise its safety.

These posts are for information sharing purposes only, and should not be used in lieu of an OEM service manual or factory authorized service procedure. We are not in the auto repair business nor do we publish automotive service manuals. Nothing we include on these pages and posts has been reviewed, approved or authorized by any vehicle manufacturer.

Technology is always changing and what is current and accurate today may be literally out-of-date and inaccurate tomorrow. And when it comes to the current state of flux in the auto industry, nothing is more true.

Permanent link to this article: https://dashboardsymbols.com/2015/07/recall-trend-highlights-electronic-and-safety-systems/

Open a Volkswagen or Audi with a Dead Key Fob

How to Open a Volkswagen or Audi with a Dead Key Fob

Retrieving the mechanical key

VW / Audi Key FobThere are three general styles of key fobs in use with Volkswagen and Audi models. With the older style shown to the right, press the chrome button on the back of the key fob (remote control or ‘clicker’) to release the spring-loaded mechanical key, which remains attached to the key fob.

Audi, VW Advanced KeyNewer Volkswagen and Audi models use what they called an Advanced Key, shown to the left. The mechanical key is separated Audi Key Fob 2from the fob (or remote control or ‘clicker’) by pressing the button on the back side of the fob, shown with the arrow, while pulling on the same key ring end.

Audi introduced a third Advanced Key fob style in 2016 that for some reason requires pushing two buttons at the same time. They are on either side of the key ring end, as shown. Push them both while pulling the key ring out to retrieve the mechanical key.

Audi fob newAnd yet a fourth key fob from Audi has a chrome button on the back, similar to the unit above, but below the chrome end. push the button and pull on the key ring end to remove the mechanical key. We saw it first in the new 2019 Q8.

Getting Inside

On some models, the lock cylinder (keyhole) at the back of the door handle will be visible. If so, simply use the key blade to unlock the door.VW /Audi Keyhole Cover

If the keyhole at the back of the driver’s door handle is hidden, press the key blade about a half inch straight up in the hole on the underside of the keyhole cover (a). If you are in the dark, you may need to feel for the hole. This action will loosen the cover and pulling on the door handle will allow you to remove it. Yes, you must remove a piece of the car. Use the mechanical key in the now-exposed lock to unlock the driver’s door.

Continue to Part II, Getting Started …

——————————————————————-

Remember that only proper service and repair procedures will ensure the safe and reliable operation of your car. In addition, proper safety procedures and precautions, such as the  use of safety goggles, the right tools and the equipment should be followed at all times to eliminate the possibility of personal injury or improper service which could damage the vehicle or compromise its safety.

These posts are for information sharing purposes only, and should not be used in lieu of an OEM service manual or factory authorized service procedure. We are not in the auto repair business nor do we publish automotive service manuals. Nothing we include on these pages and posts has been reviewed, approved or authorized by any vehicle manufacturer.

Technology is always changing and what is current and accurate today may be literally out-of-date and inaccurate tomorrow. And when it comes to the current state of flux in the auto industry, nothing is more true.

Permanent link to this article: https://dashboardsymbols.com/2012/04/volkswagen-and-audi-dead-key-fob-help/

Open a Volvo or Polestar with a Dead Key Fob

How to Open a Volvo or Polestar with a Dead Key Fob

Retrieving the mechanical key

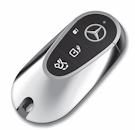
Three key fob or remote key or remote control styles are in play for Volvo. With new ownership and a redesign of the XC-90 in 2016 and spreading into other models as they are updated, including the first new Polestar models, comes a new key fob style.

It should be noted that in 2021, a smart phone app became available for both Volvo and Polestar models and can be used to open and start these vehicles. A key card is added beginning in 2024.

Volvo Key Style 2As we noted, beginning with the 2016 Volvo XC-90 redesign as well as all Polestar models, a new style key fob is used (right). To retrieve the mechanical key or key blade, look for a slide lever on the top of the key ring end of the fob. This will free the front cover, which needs to be removed.

Volvo Key Blade 2To do this, push the cover slightly down and away from the key ring end. It can then be pulled up and out, exposing the mechanical key. The key blade can then be lifted out.

The key holes on most models may not be immediately visible, but help with that can be found below.

Volvo KeyWith the previous generation key fobs, the is pulled away from the fob rather easily. Slide the spring loaded catch on the back of Remote Key (remote control or ‘clicker’) to the side. Pull the key blade straight out of the remote key. On some models, the lock cylinder (keyhole) at the back of the door handle will be visible. If so, use the key blade to unlock the door. See below if the key hole is hidden.

Early Volvo key fobWith the first generation Remote Key, a similar spring loaded catch will be found on the top of the fob, on the key ring end. As with the fob above, slide the catch to the side and pull the mechanical key away. Again, the lock cylinder (keyhole) at the back of the door handle may or may not be visible. See below if the key hole is hidden.

Getting Inside

Note: Unlocking the vehicle with the mechanical key will set off the alarm. Following the start procedure will also turn off the alarm.

Volvo Style 2 LockIn the Volvo XC-90 and other redesigns going forward since 2016, as well as the Polestar 2, the key hole is also hidden, but easily found and nothing needs to be removed. Simply pull the door handle out as far as possible and the key hole is exposed, as shown in the image.

Insert the mechanical key (it may be awkward to get at) and turn it clockwise to unlock. Remove the key blade and release the handle. Pull the handle once again and you are in the car.

LC500 key holeThe Polestar 1 features a door handle that is flush to the car’s body. Push the front of the handle inward and pull away the back, as seen to the right. The key hole is now exposed. As above, insert the mechanical key and turn it clockwise to unlock. Remove the key blade and release the handle. Pull the handle once again and you are in the car.

Polestar 4 back up entryPolestar-3 door handleA mechanical key is not available to unlock the Polestar 3 or Polestar 4. The smart phone app or the vehicle’s key card will be needed. With the Polestar 3, the card is touched to the front of the driver’s door handle (right). With the Polestar 4, the card is touched to the middle of the door pillar just behind the driver’s door (far right).

The app simply uses a tap on the screen.

For older Volvo models, if the keyhole at the back of the driver’s door handle is hidden, follow the next set of instructions.

Volvo Keyhole CoverPress the key blade about a half inch straight up in the hole on the underside of the keyhole cover (right), found at the back of the driver’s door handle. This action will force off the cover. If you are in the dark, you may need to feel for the hole. Yes, you must remove a piece of the car, but it is ok and necessary. Use the mechanical key in the now-exposed lock to unlock the driver’s door.

Continue to Part II, Getting Started …

——————————————————————-

Remember that only proper service and repair procedures will ensure the safe and reliable operation of your car. In addition, proper safety procedures and precautions, such as the  use of safety goggles, the right tools and the equipment should be followed at all times to eliminate the possibility of personal injury or improper service which could damage the vehicle or compromise its safety.

These posts are for information sharing purposes only, and should not be used in lieu of an OEM service manual or factory authorized service procedure. We are not in the auto repair business nor do we publish automotive service manuals. Nothing we include on these pages and posts has been reviewed, approved or authorized by any vehicle manufacturer.

Technology is always changing and what is current and accurate today may be literally out-of-date and inaccurate tomorrow. And when it comes to the current state of flux in the auto industry, nothing is more true.

Permanent link to this article: https://dashboardsymbols.com/2012/04/volvo-dead-key-fob-help/

Open a Toyota, Scion or Lexus with a Dead Key Fob

How to Open a Toyota, Scion or Lexus with a Dead Key Fob

Retrieving the mechanical key

Early LS key fobFour key fob (remote control or ‘clicker’) versions may be seen in Toyota, Lexus and Scion models. The earliest version (left), used only in the Lexus LS for a few years, the mechanical key remains attached to the key fob. Pull the latch found on top of the fob. At the same time, slide the lever on the side upward until the key blade is fully exposed.

toyota_keyThe mechanical key is removed from the remaining fob styles. Slide the catch on the top of most Lexus key fobs, or on the side of Toyota and Scion models. Some later Toyota Key FobLexus models use this key as well. Pull the key ring from the fob while the catch is slid to one side to remove the emergency or mechanical key blade.

Lexus Key Fob 2A slight variation in even later Lexus models has the slide lever on the top of the key ring end, but not on the mechanical key itself. Slide the lever and pull the key ring away to retrieve the mechanical key.


Getting Inside

On some models, the lock cylinder or keyhole at the back of the door handle will be visible. If so, use the key blade to unlock the door.

toyota_handleIf the keyhole is not visible, insert the mechanical key into the slot at the base of the door lock cover located near the back of the driver’s door handle and lift slightly to pry away the lock cover and expose the lock cylinder. If you are in the dark, you may need to feel for the slot. Yes, you must pry off a piece of the car. Insert the key blade into the now-exposed lock cylinder to operate. The key can only be inserted in one direction, so turn the key over and try again if it does not go in the first time.

NX key holeIf you do not see a seam or a keyhole, you have the latest Lexus models, the NX, UX and RC as well as RX models built after 2016.  This door handle style has since been incorporated into ES and LS models. Pull the driver’s door handle out as shown in the image to expose the keyhole. Insert the mechanical key and turn and you’re in. There is only a small amount of space, so actually turning the key can be a chore.

LC500 key holeIf you are fortunate enough to own the Lexus LC models, the door handles are flush to the body. Press the front of the driver’s door handle inwards, then pull the rear of the handle out. The key hole is then exposed behind the rear portion of the handle. As above, insert the key and turn and you’re in.

540i key hole capFinally, with the re-introduced Toyota Supra in 2020 come open and start features clearly taken from BMW! The key hole is hiding behind an oval shaped cover at the back of the driver’s door handle. Pull the door handle out and feel for a metal clip is behind the cap and give it a push outward.

540i cap removedThe cap will practically fly off revealing the key cylinder. You are still removing a piece of your car and its still ok! Let go of the handle and use the mechanical key to unlock the door using the key cylinder that is now visible through the handle and you’ll be inside.

Lexus pry off coverNew in 2023, Lexus NX, RX, RZ and TX feature a rectangular pry off cover (right) at the back of the driver’s door handle. Slip a credit card or some equivalent into a gap at the front of the cover and pry the cover outward.  When the cover clears the handle, push it from the rear to remove it fully. The key hole will then be exposed.

Click here for video help with these models and key fobs.

Models covered include the Lexus CT, ES, GS, GX, IS, LS, LX, NX, RC, RX, RZ, TX, UX, and Toyota FR-S, iA, iM, tC, 4Runner, Avalon, Camry, Corolla, Highlander, Land Cruiser, Mirai, RAV4, Sequoia, Sienna, Tacoma, Tundra, Yaris, 86, C-HR, Supra, and Prius.

Continue to Part II, Getting Started …

——————————————————————-

Remember that only proper service and repair procedures will ensure the safe and reliable operation of your car. In addition, proper safety procedures and precautions, such as the  use of safety goggles, the right tools and the equipment should be followed at all times to eliminate the possibility of personal injury or improper service which could damage the vehicle or compromise its safety.

These posts are for information sharing purposes only, and should not be used in lieu of an OEM service manual or factory authorized service procedure. We are not in the auto repair business nor do we publish automotive service manuals. Nothing we include on these pages and posts has been reviewed, approved or authorized by any vehicle manufacturer.

Technology is always changing and what is current and accurate today may be literally out-of-date and inaccurate tomorrow. And when it comes to the current state of flux in the auto industry, nothing is more true.

Permanent link to this article: https://dashboardsymbols.com/2012/04/toyota-scion-or-lexus-dead-key-fob-help/