Tag: won’t open
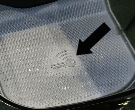
How to Open a Vauxhall with a Dead Key Fob This page holds all of the emergency open or back-up open procedures needed for Opel or Vauxhall vehicles if the battery in the key fob dies or if there are electrical signals interfering with the fob. Open a Vauxhall or Opel First note that if …
Continue reading
Permanent link to this article: https://dashboardsymbols.com/2020/12/vauxhall-dead-key-fob-help-part-i-getting-in/
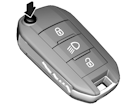
How to Open a Holden with a Dead Key Fob This page holds all of the emergency open or back-up open procedures needed for Holden vehicles if the battery in the key fob dies or if there are electrical signals interfering with the fob. Getting into Your Holden But first, if you are already inside, …
Continue reading
Permanent link to this article: https://dashboardsymbols.com/2020/10/holden-dead-key-fob-help-part-i-getting-in/
How to Open, Start and Replace Fob Batteries in Alfa Romeo Vehicles We have two videos thus far for Alfa Romeo owners The video will help Alfa Romeo owners get in and start keyless start their Giulia, Stelvio and Tonale models . ——————————————————————- Alfa Romeo key fob battery replacement. ——————————————————————- The information on this …
Continue reading
Permanent link to this article: https://dashboardsymbols.com/2020/04/alfa-romeo-video-help-with-dead-key-fob-batteries/
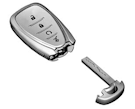
How to Open an Alfa Romeo with a Dead Key Fob This page holds all of the emergency open or back-up open procedures needed for Alfa Romeo vehicles if the battery in the key fob dies or if there are electrical signals interfering with the fob. First, if you are already inside, click here for …
Continue reading
Permanent link to this article: https://dashboardsymbols.com/2018/12/alfa-romeo-dead-key-fob-help-part-i-getting-in/
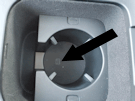
How to Start a Mercedes-Benz with a Dead Key Fob This page holds all of the emergency start or back-up start procedures needed for Mercedes-Benz vehicles if the battery in the key fob dies or if there are electrical signals interfering with the fob. Starting Your Mercedes-Benz But first, if you are still locked out, …
Continue reading
Permanent link to this article: https://dashboardsymbols.com/2018/11/mercedes-benz-dead-key-fob-help-part-ii-getting-started/
How to Start an Audi with a Dead Key Fob This page holds all of the emergency start or back-up start procedures needed for Audi vehicles if the battery in the key fob dies or if there are electrical signals interfering with the fob. Starting Your Audi But first, if you are still locked out, …
Continue reading
Permanent link to this article: https://dashboardsymbols.com/2018/11/volkswagen-and-audi-dead-key-fob-help-part-i-getting-started/
How to Start a Volvo with a Dead Key Fob This page holds all of the emergency start or back-up start procedures needed for Volvo vehicles if the battery in the key fob dies or if there are electrical signals interfering with the fob. But first, if you are still locked out, click here for …
Continue reading
Permanent link to this article: https://dashboardsymbols.com/2018/11/volvo-dead-key-fob-help-part-i-getting-started/