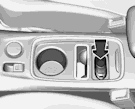
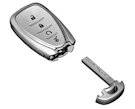
Tag: won’t start

Start a Nissan or Infiniti with a Dead Key Fob

How to Start a Nissan or Infiniti with a Dead Key Fob

Starting Your Nissan or Infiniti

Nissan Key Port 1Two methods exist in Nissan and Infinity vehicles. Some models use method 1. In this case, insert the Intelligent Key in the port provided. It will be found to the left of the steering column. It might be horizontal (first image) or vertical (second image).

If an attempt is made to start the vehicle with a discharged Intelligent Key, a guide light will illuminate at the port. Insert the key fob with the buttons up in the horizontal Nissan Key Port 2port or with the buttons facing the door in the vertical port. Make sure the key ring side is out.

Once the key fob is inserted, the vehicle can be started as normal by pressing the Start / Stop ignition button while depressing the brake. Note that the port does not recharge the fob’s battery.

Nissan Start StyleIf a port does not exist, method 2 comes into play. Simply touch the ignition switch with the Intelligent Key (a chime will sound). Push the ignition Start / Stop button while depressing the brake pedal within 10 seconds after the chime sounds to start the engine.

Mercedes Start ButtonAnd finally, in the Infiniti QX30, the Start / Stop button appears to ‘float’ above the dashboard. Pull it away exposing the ignition switch. If necessary the tip of the mechanical key can be used as a pry bar.

Please, please, do NOT try this if you do NOT have a tapered key as shown above! Insert the tapered end of the key fob into the switch and turn to start the car old school style.

Note: If you have made an attempt to start the vehicle without success, there may be residual pressure in Use Brake Indicatorthe brake system and a new warning light may appear (left) or text message to Step on the Brake. Press the brake pedal very, very hard when trying to start the vehicle again to be sure that the release switch behind the pedal is engaged. Or wait a few minutes and try again.

Click here for video help with Nissan and Infiniti models and key fobs.

Models examined include 370Z, Altima, Armada, Cube, Frontier, GT-R, Juke, Kicks, Maxima, Murano, NV, Pathfinder, Quest, Rogue, Sentra, Titan, Versa, Xterra, Z, EX, FX, G, JX-35, M, Q40, Q50, Q60, Q70, QX30, QX50, QX55, QX56, QX60, QX70, and QX80.

… Return to Part I, Getting In

——————————————————————-

Remember that only proper service and repair procedures will ensure the safe and reliable operation of your car. In addition, proper safety procedures and precautions, such as the  use of safety goggles, the right tools and the equipment should be followed at all times to eliminate the possibility of personal injury or improper service which could damage the vehicle or compromise its safety.

These posts are for information sharing purposes only, and should not be used in lieu of an OEM service manual or factory authorized service procedure. We are not in the auto repair business nor do we publish automotive service manuals. Nothing we include on these pages and posts has been reviewed, approved or authorized by any vehicle manufacturer.

Technology is always changing and what is current and accurate today may be literally out-of-date and inaccurate tomorrow. And when it comes to the current state of flux in the auto industry, nothing is more true.

Permanent link to this article: https://dashboardsymbols.com/2018/11/nissan-infiniti-dead-key-fob-help-part-ii-getting-started/

Start a GMC with a Dead Key Fob

How to Start a GMC with a Dead Key Fob

Starting Your GMC

Hummer start slotTo start a GMC model with a dead key fob, a pocket to place the transmitter will need to be identified. Once the fob is properly placed, the vehicle will recognize the fob and the vehicle can be started as normal. In the new Hummer EV, the pocket is the rear cup holder, as shown to the right. Place the key fob in the cup holder with the buttons facing up and start the car as normal, pressing  the brake pedal and the POWER button while in park or neutral.

Tahoe Escalade Suburban back-upThe large SUV’s from GM, including the GMC Yukon, feature a transmitter pocket located in the face of the front of the inside of the center console, as shown to the right. Slide the transmitter into the pocket with the key ring facing out, buttons forward (in a Chevrolet Suburban we had on hand, the engine started with the buttons facing either way). It is a loose fit, but don’t be concerned. With the vehicle in Park or Neutral, press the brake pedal and the Start / Stop ignition button as normal. Check out the video here.

Sierra LD buckets start locationSierra b-u with bucket seatsIn an all to common inability to leave well enough alone, this is changed in the Yukon with bucket seats for the 2021 model year. Its changed again in 2023 (below). This will also cover the 2020 and newer GMC Sierra. There are now three back up locations for the transmitter. Again if the vehicle has bucket seats, the transmitter is dropped between the two cup holders (right). In the Sierra in 2022, the cup holders are one in front of the other (far right). In this case, drop the transmitter in the space between the cup holders and the shifter.

Sierra back-u no bucket seatsIn both the Sierra and Yukon models in 2021 and beyond without bucket seats, the back up transmitter pocket is a slot at the back of the lowest storage bin (there are two of them) in the center area of, and beneath, the front seat. In all cases, once the transmitter is in place, press the brake pedal and the Start / Stop button together, starting the vehicle as normal.

Terrain back up spotThe Terrain small crossover SUV got its first taste of keyless ignition in the 2018 model. It has bucket seats and the back up location is in a cup holder, nearly identical to the Yukon above, and exactly what the Yukon with bucket seats uses beginning in 2023. The cup holders are side by side (right) and the left side cup holder is used. As always, face the buttons up and with the vehicle in Park or Neutral, press the brake pedal and the Start / Stop ignition button as normal.

Acadis SlotIn the Acadia crossover, the pocket for the transmitter is located in the face of the rear of the inside of the center console. Slide the transmitter into the pocket with the key ring facing out, and the buttons up (or however it will fit!). With the vehicle in Park or Neutral, press the brake pedal and the Start / Stop ignition button as normal. And we have a video of the process here.

Acadia back-up pocketThe location is changed in the Acadia for the 2020 model year, though 2023. For those years, the back up slot is at the bottom of the center console, as shown to the right. The console liner must be lifted away to expose what is a fob-shaped depression. Once again, with the transmitter in place, press the Start / Stop button and the brake pedal together to start the vehicle.

In 2024 Acadia, the back up pocket pocket is moved to the driver’s side cup holder. See the Terrain, above.

Canyon b-u spotIn 2023, the Canyon gets its first look at keyless start. In this case however, the back up spot is in the right cup holder (right image). Evidently, just to be different. And again, with the transmitter or key fob in place, press the Start / Stop button and the brake pedal together to start the vehicle as normal.

Use Brake IndicatorNote: If you have made an attempt to start the vehicle without success, there may be residual pressure in the brake system and a new warning light may appear (left) or text message to Step on the Brake. Press the brake pedal very, very hard when trying to start the vehicle again to be sure that the release switch behind the pedal is engaged. Or wait a few minutes and try again.

… Return to Part I, Getting In

——————————————————————-

Remember that only proper service and repair procedures will ensure the safe and reliable operation of your car. In addition, proper safety procedures and precautions, such as the  use of safety goggles, the right tools and the equipment should be followed at all times to eliminate the possibility of personal injury or improper service which could damage the vehicle or compromise its safety.

These posts are for information sharing purposes only, and should not be used in lieu of an OEM service manual or factory authorized service procedure. We are not in the auto repair business nor do we publish automotive service manuals. Nothing we include on these pages and posts has been reviewed, approved or authorized by any vehicle manufacturer.

Technology is always changing and what is current and accurate today may be literally out-of-date and inaccurate tomorrow. And when it comes to the current state of flux in the auto industry, nothing is more true.

Permanent link to this article: https://dashboardsymbols.com/2018/11/gmc-dead-key-fob-help-part-ii-getting-started/

Start a BMW or Mini with a Dead Key Fob

How to Start a BMW or Mini with a Dead Key Fob

Starting Your BMW or Mini

BMW Key SlotSome BMW and Mini models already require that the key fob be inserted into the dashboard next to the Start/Stop button. If the key fob battery is dead, the vehicle will recognize the fob when inserted. In “Comfort Access” models, the slot is only needed if the fob’s battery dies, or if electrical interference interrupts the fob’s signal. Insert the fob into the slot and use the Start/Stop button as normal.

For other BMW or Mini models, hold the remote control against the marked area on the steering column and press the Start/Stop button within 10 seconds while depressing the brake.

The process remains the same in the new EV line from BMW, starting with the i4 and iX. However, there are now two additional back up start methods available in these vehicles.

BMX consolei4 charge padThe smart phone recharge pads also act as new start points. A properly connected key card or a smart phone holding the proper BMW app touched to the pads will allow the car to start. The pad is found in front of the cup holders in the i4 (first image) and on the lower level of the iX console (second image).

Note: If you have made an attempt to start the vehicle without success, there may be residual pressure in the brake system and a new warning light may appear (left) or text Use Brake Indicatormessage to Step on the Brake. Press the brake pedal very, very hard when trying to start the vehicle again to be sure that the release switch behind the pedal is engaged. Or wait a few minutes and try again.

Video Help with Your BMW or Mini

There are lots of videos here to help out.

Recharging the Display KeyBMW Display Key

In an automotive first, BMW‘s Display Key (right) actually has a rechargeable battery. The display is automatically disabled when the charge is low, which is a major hint that the device needs to be recharged!

BMW Charge PortThe car features a wireless cell phone charging station inside the center console. There is also a bulge into which the Display Key can be slipped, with the lock button up and out. The Key is charged with a micro USB cable, a micro USB port on the Key (see the arrow on the Display Key) and the USB port at the back of the console.

Related: Getting Out!

… Return to Part I, Getting In

——————————————————————-

Remember that only proper service and repair procedures will ensure the safe and reliable operation of your car. In addition, proper safety procedures and precautions, such as the  use of safety goggles, the right tools and the equipment should be followed at all times to eliminate the possibility of personal injury or improper service which could damage the vehicle or compromise its safety.

These posts are for information sharing purposes only, and should not be used in lieu of an OEM service manual or factory authorized service procedure. We are not in the auto repair business nor do we publish automotive service manuals. Nothing we include on these pages and posts has been reviewed, approved or authorized by any vehicle manufacturer.

Technology is always changing and what is current and accurate today may be literally out-of-date and inaccurate tomorrow. And when it comes to the current state of flux in the auto industry, nothing is more true.

Permanent link to this article: https://dashboardsymbols.com/2018/11/bmw-mini-dead-key-fob-help-part-ii-getting-started/

Start a Mazda with a Dead Key Fob

How to Start a Mazda with a Dead Key Fob

Getting Your Mazda Started

Mazda uses three versions of keyless start systems, and so three are back up start options. We will show them in reverse order, newer versions first, as they are now used throughout the line. So, here’s the scoop.

Mazda Start Style 3The CX5 was the first model to use Method 3 and by 2016 all Mazda models use this method. Push the brake pedal, or the clutch pedal if you have a manual transmission. This will cause the indicator light in the Start / Stop button to flash green. While it flashes, touch the back side of the key fob to the Start / Stop button, which will cause the green indicator light to stop flashing and remain lit. Push the Start / Stop button to start the engine as normal – or with the fob itself.

Mazda Start Style 2Method 2 is found in the CX7, CX9, MX-5 and RX8 models. Remove the Start knob cover by pushing both release buttons and pulling the cover off exposing the key cylinder. Slide the auxiliary key out from the bottom of the advanced key (see above) and insert it into the cylinder. Turn the key to start the engine.

Mazda Start Style 1For Method 1, found in the Mazda3 (including MazdaSpeed3) and Mazda6 prior to 2014, slide the auxiliary key out from the bottom of the advanced key (see above). Use the auxiliary key to remove the key slot cover located on the right side of the steering column. Depress the clutch (manual) or brake pedal (automatic) until the ring around the key slot starts flashing. Insert the auxiliary key into the slot while it is flashing, but do not turn the auxiliary key in the slot. Press the push button start to start the engine.

Engine Start Operation IndicatorNote: If you have made an attempt to start the vehicle without success, there may be residual pressure in the brake system and a new warning light may appear (left) or text message to Step on the Brake. Press the brake pedal very, very hard when trying to start the vehicle again to be sure that the release switch behind the pedal is engaged. Or wait a few minutes and try again.

… Return to Part I, Getting In

——————————————————————-

Remember that only proper service and repair procedures will ensure the safe and reliable operation of your car. In addition, proper safety procedures and precautions, such as the  use of safety goggles, the right tools and the equipment should be followed at all times to eliminate the possibility of personal injury or improper service which could damage the vehicle or compromise its safety.

These posts are for information sharing purposes only, and should not be used in lieu of an OEM service manual or factory authorized service procedure. We are not in the auto repair business nor do we publish automotive service manuals. Nothing we include on these pages and posts has been reviewed, approved or authorized by any vehicle manufacturer.

Technology is always changing and what is current and accurate today may be literally out-of-date and inaccurate tomorrow. And when it comes to the current state of flux in the auto industry, nothing is more true.

Permanent link to this article: https://dashboardsymbols.com/2018/11/mazda-dead-key-fob-help-part-ii-getting-started/

Start a Cadillac with a Dead Key Fob

How to Start a Cadillac with a Dead Key Fob

Starting Your Cadillac

Cadillac vehicles use two of GM‘s three different style keys and many different start procedures or locations. They are all here, and you can find a whole lot of videos here.

Inside door releaseHere’s the deal: Buckle up, find your model, and if the main start battery is still good, we’ll get you underway.

The Cadillac Coupes show up early in this list: the CTS, XLR, and ELR. So, please note immediately that the latches are electronic and if the main 12-volt battery is dead and you’ve closed the door, the lever to the right is your only escape. You will find it below the door on the floor where you would expect to find a trunk release (right). Pull it up and the door will open. There’s another on the passenger side for that door.

GM back up start 11With Style 1 (square) key fob, used in most GM vehicles prior to 2014, and in some Cadillac CTS Coupes and Sedans ongoing, place the transmitter in the transmitter pocket at the top and rear of the center console storage area with the buttons facing towards the front of the vehicle (right).

With the vehicle in Park or Neutral, press the brake pedal and the Start / Stop button to start the vehicle as you would normally.

GM start 3The XLR Coupe use either a small key fob that does not hold a mechanical key or the Style 1 fob. Regardless of the key fob type, the pocket for the transmitter (or fob) is on the left of the inside of the glove box. Place the transmitter in the pocket with the buttons facing the glove box storage area (right).

Again, with the vehicle in P (Park) or N (Neutral), press the brake pedal and the Start / Stop ignition button as normal.

GM start 2In the Cadillac SRX, the transmitter pocket is located at the bottom of the console storage area (right). The new CT5 crossover uses this location as well, but using the Style 3 key fob. The spot may be beneath a storage tray, which must be lifted out, or at least beneath all the stuff that has gathered inside. Then insert the transmitter with the buttons facing up and with the vehicle in Park or Neutral, press the brake pedal and the Start / Stop ignition button as normal.

CTS SRX back-upThe new key style, Style 3, was introduced in 2014. In the ELR Coupe and some CTS Sedans and Wagons (later models all use this location), locate the transmitter pocket on the shelf in the front of the console, as shown to the right. It is beneath a rubber that will need to be removed, and is the shape of the transmitter. Place the transmitter in the pocket, buttons facing up, and with the vehicle in Park or Neutral, press the brake pedal and the Start / Stop ignition button as normal.

XTS PocketIn the XTS sedan, the transmitter pocket is found in the front of the center console storage area. A storage tray may have to be lifted out. Place the transmitter in the pocket with the key ring up and the buttons facing out. See the image below. With the vehicle in Park or Neutral, press the brake pedal and the Start / Stop ignition button as normal. Check out the video here.

ATS STS back-upIn ATS sedan, the transmitter pocket is located in the face of the front of the inside of the center console, similar to or as shown to the right. Slide the transmitter into the pocket with the key ring facing out and buttons up. With the vehicle in Park or Neutral, press the brake pedal and the Start / Stop ignition button as normal.

CT6 back up slotIn the CT6 sedan, the transmitter pocket is located in the center console as well, but  in the face of the back of the console, as shown to the right. Slide the transmitter into the pocket with the key ring up and buttons facing the front of the car. With the vehicle in Park or Neutral, press the brake pedal and the Start / Stop ignition button as normal.

Cadillac now has new models and as has become all too common with General Motors, the back up locations are new and not reflective of any used XT4 back-uppreviously in a Cadillac model. And the Escalade went along for the ride.

In the XT4 and the 2020 Escalade and Escalade ESV, the key fob is dropped into the front cup holder, as shown to the right. Make sure the cup holder is empty and that the fob’s buttons are facing up. With the vehicle in Park or Neutral, press the brake pedal and the Start / Stop ignition button as normal.

Caddy rear cup holderMeanwhile, the new CT4, CT5 and Lyriq EV models, for no apparently good reason, use the rear cup holder as the back up start location. Again, make sure the cup holder is empty and that the key fob’s buttons are facing up. With the vehicle in Park or Neutral, press the brake pedal and the Start / Stop ignition button as normal to start the vehicle.

XT5 back-upIn the XT5 and XT6 SUVs, clear away anything being stored in the center console. At the bottom near the back, there is a depression shaped like the Cadillac key fob. Set the fob down in the depression with the buttons facing up. With the vehicle in Park or Neutral, step on the brake pedal and press the Start / Stop ignition button as normal.

The large SUV’s from GM, including the Escalade (prior to 2020), feature a transmitter Tahoe Escalade Suburban back-uppocket also located in the face of the front of the inside of the center console. However, the pocket points down, as shown to the right. The pocket in the Escalade is placed to the center and a bit lower. Slide the transmitter into the pocket with the key ring facing out, buttons forward (in a Suburban we had on hand, the engine started with the buttons facing either way). It is a loose fit, so don’t be concerned. With the vehicle in Park or Neutral, press the brake pedal and the Start / Stop ignition button as normal. Check out the video here.

Note: If you have made an attempt to start the vehicle without success, there may be residual pressure in the brake system and a new warning light may appear (left) or text Engine Start Operation Indicatormessage to Step on the Brake. Press the brake pedal very, very hard when trying to start the vehicle again to be sure that the release switch behind the pedal is engaged. Or wait a few minutes and try again.

… Return to Part I

——————————————————————-

Remember that only proper service and repair procedures will ensure the safe and reliable operation of your car. In addition, proper safety procedures and precautions, such as the  use of safety goggles, the right tools and the equipment should be followed at all times to eliminate the possibility of personal injury or improper service which could damage the vehicle or compromise its safety.

These posts are for information sharing purposes only, and should not be used in lieu of an OEM service manual or factory authorized service procedure. We are not in the auto repair business nor do we publish automotive service manuals. Nothing we include on these pages and posts has been reviewed, approved or authorized by any vehicle manufacturer.

Technology is always changing and what is current and accurate today may be literally out-of-date and inaccurate tomorrow. And when it comes to the current state of flux in the auto industry, nothing is more true.

Permanent link to this article: https://dashboardsymbols.com/2018/09/cadillac-dead-key-fob-help-part-ii-getting-started/

Open a Cadillac with a Dead Key Fob

How to Open a Cadillac with a Dead Key Fob

Getting into Your Cadillac

Retrieving the mechanical key

Cadillac vehicles use three key GM Key Style 1fob (remote control or ‘clicker’) styles, and two (GM Styles 1 and 3) have mechanical keys embedded inside. That key will be used to unlock the driver’s door or the trunk (yes, the trunk) and in some cases to remove a piece of the car!

If your vehicle is the XLR Coupe, a mechanical key is provided separately. Be sure to keep it around!

For Style 1 (above right), press the thin button near the bottom of the transmitter (remote control or ‘clicker’) used to remove the mechanical key. Do not pull the mechanical key out without pressing the button.

GM Style 3The Style 3 key fob is similar to Style 1, in that the mechanical key is removed from the fob for use getting into the vehicle. To remove the mechanical key, press the button on the side of the transmitter near the key ring, as shown, and pull out the key.

If a key hole is visible at the back of the driver’s door handle, simply insert the key and turn and you’re in.

Getting Inside

GM Lock Cover RemoveMany GM models hide the key holes under a cap at the back of the driver’s door. They include the Cadillac CT4, CT6, CTS, XT4, XT5, XT6, XTS and ATS.

*Note the additional Escalade instructions below and that 2020 brings a  completely new cap, also below.

To remove the first cap, pull the door handle out to the open position. Insert the key into the slot on the bottom of the cap (3, right). Push it as far upwards as possible and hold upward pressure. Then pry outward. And yes, you WILL feel like you are prying off a piece of your car! Move the cap rearward revealing the key cylinder. Now the mechanical key can be used in the cylinder. Look for a video here to help.

To replace the cap, insert the two tabs at the back of the cap between the black seal and the metal base. Pull the door handle out to the door open position and move the cap forward and press to snap it into place. You can then release the door handle.

The Escalade, until 2017, features a new wrinkle in the hidden Escalade Cylinder Capkey hole. The cylinder is hidden in the same place and manner, but the cap is the top, 1/8 of an inch portion. To remove it, the door handle must be pulled fully open. Then, push the cap towards the handle to release it. It may take a bit of force to accomplish this. See two videos here.

IMPORTANT! The Cadillac XTS uses both types of caps to hide the key holes shown above. Look or feel for a slot as described with the first cap. If its there, follow the first instructions. If there is no slot, follow the instructions for the early Escalade.

Replacing it is a simple matter of reversing the removal process and simpler than the process needed for the old style.

GM Lock Cover RemoveIn the middle of the 2017 model year, the Escalade, while retaining the hidden key hole, was shifted to the method shown previously. So, starting in 2017, look for a slot beneath the cap. If its there, use the key as described above. Push it into the slot as far upwards as possible, then pry outward. Move the cap rearward revealing the key cylinder.

New Caddy lock cylinder capThen in 2020, Cadillac came up with a whole new cap. As with the first style, there is a slot beneath the cap (right). The handle is first identified by its more curved appearance front to back and a separation near the top. Only the bottom can be removed. It is found on the Escalade and CT5.

Insert the mechanical key into the slot at the bottom of the handle and push upward all the way until the New Caddy cap swinging upcover frees. It will pop out about 1/8 of an inch. Remove the key – do not pry or pull with it. Once free, the cap simply swings up and can be pulled away (right).

With all these options the mechanical key can be used in the now-exposed lock cylinder. We have a video here as well to help.

Remember, getting IN the car is most important. If you have difficulty replacing the cap, don’t. Let your dealer do it when you get a new battery for your Key FOB!

Coupe_flush_handleThe CTS, XLR and ELR Coupes have flush door handles (left image) with no key holesCTS ELR open handle at all. They have a very different trick up their sleeves.

You must use the mechanical key to open the trunk. The key hole is under the lip of the trunk lid facing the ground.

Once open, you will find a release handle. It is below the forward lip of the trunk (right). Pulling the door release lever will unlock as well as unlatch the driver’s door.

Lyriq trunkWe have two videos for coupes here.

Similarly but more simply, the new Lyriq EV also requires the trunk or liftgate be unlocked using the mechanical key (right image). The front door will unlock at the same time.

Note that if the key simply spins in the cylinder, make sure that the key is fully inserted.

Related: Getting Out!

Continue to Starting Instructions …

——————————————————————-

Remember that only proper service and repair procedures will ensure the safe and reliable operation of your car. In addition, proper safety procedures and precautions, such as the  use of safety goggles, the right tools and the equipment should be followed at all times to eliminate the possibility of personal injury or improper service which could damage the vehicle or compromise its safety.

These posts are for information sharing purposes only, and should not be used in lieu of an OEM service manual or factory authorized service procedure. We are not in the auto repair business nor do we publish automotive service manuals. Nothing we include on these pages and posts has been reviewed, approved or authorized by any vehicle manufacturer.

Technology is always changing and what is current and accurate today may be literally out-of-date and inaccurate tomorrow. And when it comes to the current state of flux in the auto industry, nothing is more true.

Permanent link to this article: https://dashboardsymbols.com/2018/09/cadillac-dead-key-fob-help-part-i-getting-in/
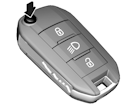
Open a GMC with a Dead Key Fob

How to Open a GMC with a Dead Key Fob

Getting into Your GMC

Retrieving the Mechanical Key

GM Style 3Yukon key fobKeyless or push button start GMC models use the third of three GM key styles. A mechanical key is held inside the fob and is needed to get into the vehicle.

There are two slightly different shapes, but each operates in the same basic way. There is a button on the side of the key fob or transmitter near the key ring, as shown above. To remove the mechanical key, press the button and pull the key away.

Getting Inside

If a key hole is visible at the back of the driver’s door handle, simply insert the key and turn and you’re in.

Unfortunately, many GM models hide the key holes under a cap at the back of the driver’s door, and this includes the GMC GM Lock Cover RemoveAcadia and Terrain. To remove the cap, pull the door handle out to the open position. Insert the key into the slot on the bottom of the cap (3, right).

Push it as far upwards as possible and hold upward pressure. Then pry outward. And yes, you WILL feel like you are prying off a piece of your car! Move the cap rearward revealing the key cylinder. Now the mechanical key can be used in the cylinder. Look for a video here to help.

To replace the cap, insert the two tabs at the back of the cap between the black seal and the metal base. Pull the door handle out to the door open position and move the cap forward and press to snap it into place. You can then release the door handle.

Remember, getting IN the car is most important. If you have difficulty replacing the cap, don’t. Let your dealer do it when you get a new battery for your Key FOB!

Continue to Part II, Getting Started …

——————————————————————-

Remember that only proper service and repair procedures will ensure the safe and reliable operation of your car. In addition, proper safety procedures and precautions, such as the  use of safety goggles, the right tools and the equipment should be followed at all times to eliminate the possibility of personal injury or improper service which could damage the vehicle or compromise its safety.

These posts are for information sharing purposes only, and should not be used in lieu of an OEM service manual or factory authorized service procedure. We are not in the auto repair business nor do we publish automotive service manuals. Nothing we include on these pages and posts has been reviewed, approved or authorized by any vehicle manufacturer.

Technology is always changing and what is current and accurate today may be literally out-of-date and inaccurate tomorrow. And when it comes to the current state of flux in the auto industry, nothing is more true.

Permanent link to this article: https://dashboardsymbols.com/2018/09/gmc-dead-key-fob-help/